

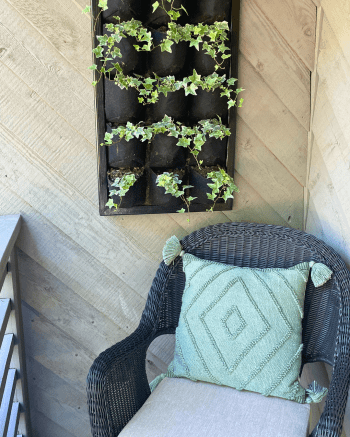
A hanging vertical plant wall is a great way to add a touch of greenery to your front porch! Not only does it make your porch more inviting, but it also enhances the curb appeal of your home. If you’re interested in creating a hanging vertical plant wall for your front porch, here’s a step-by-step guide on how to do it:
Step 1: Choose the Right Location
The first step in creating a hanging vertical plant wall is to choose the right location for it. You want to make sure that the location you choose gets enough sunlight for your plants to thrive or if it’s a shaded area select shade-loving plants. You also want to make sure that the location is easy to access so that you can water and tend to your plants regularly.
Step 2: Choose Your Plants
The second step is to choose the plants that you want to use for your hanging vertical plant wall. You want to choose plants that are suited for the amount of sunlight and the climate in your area. Some good options for hanging planters include trailing plants, ferns, and ivy.
Step 3: Choose Your Hanging Planters
The third step is to choose the hanging planters that you want to use for your plant wall. You can either purchase hanging planters from a gardening store or order a wall planter on Amazon.
Step 4: Build Your Frame
The fourth steps is to build a frame with furring strips cut at 45-degree angles. You’ll need to start by measuring and cutting the wood to size using an easy-to-use miter saw box. Then, you’ll need to assemble the pieces together using wood glue and clamps, making sure the corners are aligned and square before securing them with screws or nails.

Step 5: Paint Your Frame
The fifth step is to paint should start by cleaning and sanding the frame to create a smooth surface. Then, you can apply the spray paint in thin, even coats, allowing each coat to dry before applying the next. After the paint has dried, you can add a clear coat protector to give the frame a glossy finish and protect it from scratches and fading.

Step 6: Attach Your Planter
The six step is to attach your wall planter to the back of a wooden frame with screws. First, mark the desired location for the hanger on the frame and drill pilot holes for the screws. Then, line up the planter with the pilot holes and screw it into place using a drill or screwdriver.

Step 7: Fill Your Planters with Soil
The seventh step is to fill your planters with soil. You want to use a high-quality potting soil that is specifically designed for the types of plants you are using.
Step 8: Plant Your Plants
The eighth step is to plant your plants in the soil. Make sure that the plants are positioned in a way that allows them to trail downward as they grow.

Step 9: Hang Your Planters
The ninth step is to hang your planters on your chosen location. You can use screw hooks on your wall and eye hooks on the planter frame to attach them.

Step 10: Water and Maintain Your Plant Wall
The final step is to water and maintain your plant wall regularly. Make sure that you water your plants according to their specific needs and that you trim them as needed to keep them from becoming overgrown.
Supplies List
- Wall planter
- Potting soil
- Plants
- Furring strips
- Miter saw box
- Wood glue
- Clamps
- Flat head screws
- Drill or screwdriver
- Spray paint
- Screw hooks
- Eye hooks
Creating a hanging vertical plant wall for your front porch is a great way to add a touch of greenery to your home. By following these steps, you can create a beautiful and functional plant wall that will enhance the curb appeal of your home and provide a warm welcome to your guests.
Please note: This blog post contains affiliate links, which means I may receive a small commission if you purchase through my link, at no additional cost to you. Please read my full disclosure policy for more information.